Pages

Friday, July 27, 2018

From concept to Cast Iron...

...digital fabrication meets the ancient art of iron casting.

Sculpture design, casting and photos by Lar O'Toole, Visual Artist.

In preparation for his participation in the IRON-R 18 Project (July 2018), a friend of mine, Lar O'Toole approached me with a design he wanted me to 3d print. The 3d printed objects would be  models or 'patterns' for use in the iron casting workshop (IRON-R 18). In assessing the Sketchup 3d model file he provided, there were a number of issues evident, which would lead to slicing (g-code generation) issues and a poor 3d print. These issues were not insurmountable, but with a very tight time deadline, I took on the challenge of re-drawing the model from scratch. This would give a clean STL file (format required for 3d prining) and a resulting smooth 3d print. 

My blog is in general, 3d printing focused, so I thought it worth expanding on this aspect of Lar's undertaking, but I've also embraced the opportunity to share Lar's experience of the journey from digitally sketched idea to the final and very impressive iron castings.

Lar's design is an interesting interpretation of a Ptolemaic Geocentric style model of the Universe. A central sphere (the Earth), with expanding concentric circles, but with the added twist of 'orbit' circles retreating in steps, as if to reveal and present the central sphere. A second similar but slightly different copy of the sculpture was also produced, gesturing to the ideas of Copernicus and his Copernican Heliocentric, sun centered model. The pieces are similar but different, as observed in the photo above, with the orbiting moon distinguishing the Copernican model.

3d model in Sketchup, (180mm approx diam.)

In re-drawing the design I concluded the best approach was to aim towards a "half-model", but to visualise the concentric 'circles' as cylinders, rather than spheres. Once I hit on this construction method, it came together quite quickly in Sketchup. Concentric sphere segments would be too challenging in Sketchup and better suited to something like Fusion360 of a solid modelling package.

The other and inner spherical shapes, were produced using the "follow me" tool in Sketchup, using a semi-circle as the basic shape and sweeping it through an arc.

Above, concentric cylinders, rotated in steps are clearly visible. A small hemisphere (swepted semi-circle, using the 'follow me' tool) in the middle, and a sphere segment forms the other section.

These multiple objects, pictured above, were exploded into their component elements (select all.. right-click, explode). Then the face of each step cylinder was "intersected with the model" (another right-click process), and all of the unwanted faces and lines were removed from the construction, revealing a clean half-model with a completely hollow inside (See view below showing internal hollow.).


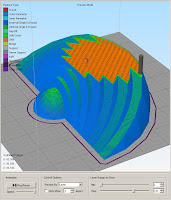
The 'half-model' was capped, producing a fully manifolded solid object, an essential requirement for 3d printing. Internal shapes or orphaned lines or surfaces will cause issues later when slicing for 3d printing. It was exported from Sketchup in STL format and sliced (in Simplify3d), producing the g-code necessary for 3d printing.

Slicing and Printing


With time pressure, I chose a coarse layer height, .3mm, and a relatively sparse infill of 10% when slicing the model in prep for printing (sliced using Simplify3d). Since Lar planned to fill and sand smooth the model, the coarse layer height wasn't an issue, and helped reduce print time considerably. The 10% infill gave more than adequate strength also.

For alignment and assembly of the two identical halves, I simply placed two holes in the model, and inserted wooden dowels for perfect assembly.


The Casting Process
Lar took things from here. I'm very grateful to him for sharing some photos of the process and providing explanations of the steps he followed. Pictures, as always, are worth a thousand words!

Smoothing of the model, was achieved by application of "Milliput" filler, a fast setting, non-shrinking epoxy putty. The surfaces were filled and sanded to a desired level of smoothness.

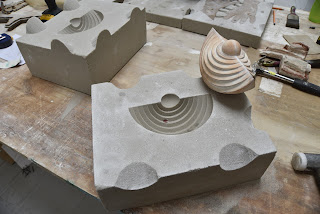
A box was built to hold the 'pattern' and it was bedded in red sand up to it's half-way line (picts below). A larger box than might be usual was made because of the final mass of poured object. The red sand was compacted and leveled and pockets removed near the edges to form registration tabs. A dusting of 'parting powder' was added to the top surface to prevent mould mix sticking to the red sand. The mould mix made of silica sand and special quick-setting resin & hardener mix, was added to form the half-mould. Once hardened (<2hrs), the box was removed and the red sand brushed off, box re-fitted and the top half of the mould formed.


Lar pointed out... "A small ball of wax was added to the edge of one of the pattern to represent a moon. The wax was removed from the mould before sealing it up." 


Lar continues to explain... "One big gate was added to fill the mould, split into two runners as it reached the void, a 'bowl' carved at the base of the gate to allow the iron to pool and reduce the chance of air bubbles forming. Two risers were added on either side to allow air to escape. Dry graphite was used as a release agent. A mixture of graphite power and alcohol was brushed on the inside of the mould to stop the iron adhering to the sand, then the alcohol was burned off."

The focus of the workshop week was mastering the skills necessary to produce the moulds. The moulds were glued and steel banded and joints further sealed with fire proof sealant. Lar continues... "The 50+ moulds were transported to the National Sculpture Factory for the pour on Saturday. Here we attached pouring cups and chimneys to the moulds. the 'burn-in' of the cupola took about 40 minutes, then a charge of coke and iron were added and the first 'tap' was ready about 25min later. This time reduced to about 12 minutes as the cupola got hotter."  


Lar: "The crucible held about 20-25kgs, but got heavier with each pour as slag and iron built up. There were about 15 pours in all over an 8hr period."

Temperatures well in excess of 1000 Degrees C are required to melt iron, This presents as spectacular lava-like pours into the awaiting moulds.

 Once cooled and broken from their moulds, the final pieces had the sprues and risers removed and were ready for finishing. Another few hours of cleaning, grinding and polishing revealed the finished items. Lar's familiarity with metal finishing showed through in his transformation of the raw state to their final look.

Lar rounded off presentation with stainless steel base plates. Fantastic results!

Lar had the vision to see the potential the digital 3d modelling medium might have to communicate his creative ideas, and the potential 3d printing might have to accelerate the preparation for casting, and the drive to want to explore the combination of the ancient skill of iron casting with the comparatively fledgling technology of 3d modelling and 3d printing. I was glad to have the opportunity to play a small part in this exploratory journey. Thanks Lar!

Ivor O'Shea

July 2018


Tuesday, June 19, 2018

OctoPrint on my Mendel90

There's nothing more convenient than OctoPrint (OctoPi) for even slightly remote management of your 3d printers (Workshop to Kitchen!)


Make good use of an older RaspberryPi and a webcam, and rig it up to manage and monitor your printers with OctoPi. https://octoprint.org/

Ivor

Monday, March 12, 2018

"Velocity Painting" experiment

Velocity Painting is a method of incorporating surface patterns into an 3d printed object by varying the print speed only. The Velocity Painting software tool post-processes the g-code output of your sliced object, applying speed changes to produce a surface pattern. The technique was conceived and developed by Mark Wheadon ( https://www.velocitypainting.xyz/ ), and Application created by Guillaume Vigneron.

This technique works best if applied to hollow, single walled objects, but as an experiment I applied it to the prosthetic hand I had previously printed for demo purposes in support of Enabling the Future local Chapter . Transparent plastic is also recommended for best outcome. 

I chose a pattern (craftsmanspace.com) and using the Velocity Paining tool, applied it to the "hand" g-code ( Flexy-Hand 2 by Gyrobot ), which was pre-sliced. The process is well documented here.


(Above - post-processed g-code preview)
The results were interesting in that while surface patterning was visible (below), the transparent plastic also allowed you to see the internal channels in the "hand" design.

The pattern is visible on the surface, but not very pronounced. I reduced the infill considerably (5%), in the hope of increasing contrast by allowing more light through. Strength loss due to reduced in-fill may make such a part too weak for purpose though.


An unexpected side product of using the transparent material was that the internal channels within the Hand became very visible. Combined with the surface patterning it produces an unusual aesthetic.

(  Ran out of transparent filament, hence the truncated print!  )


I expect it's quite subjective as to whether the effect is considered aesthetically pleasing of not.
Thought the experiment worth sharing.

Ivor


Saturday, March 3, 2018

Printing in support of local e-Nabling the Future Chapter...

Some 3d printing in support of the local e-Nabling the Future Chapter...

This design (above) is found here: https://www.thingiverse.com/thing:380665

This design if from here: https://www.thingiverse.com/thing:2576916/#files

These prints were done as demonstration pieces, in support of the a local e-Nable Chapter. 
https://www.facebook.com/groups/344234809356338/

Ivor

Sunday, April 23, 2017

Clay 3D Printing with Jonathan Keep...

When an opportunity arises to join a clay 3d printing workshop with Jonathan Keep, it should not be passed up! Jonathan describes himself simply as an artist and potter, but as evidenced by his own website, he is much more than that simple description. The breath and depth of his lifetime of work in ceramics, makes a workshop with him something much greater than a instructional 'how to' 3d print in clay. You just know it's going to be something special!

In more recent years Jonathan's exploration of digital technology, from an artists perspective, brought him to learn how to model and code in programs like Blender and Processing, creating patterns, shapes, even vessels in a virtual world. A next logical step for him was to explore how to bring the shapes to life in clay and fire into wonderful ceramic works. Learning from what the RepRap movement was sharing about 3d printing in plastics, Jonathan went about adapting a RepRap design (Rostock Delta) to print in clay, creating and sharing his own clay delta 3d printer with the world (2013).

His "Ceramic Delta" broke new ground, with it's simplicity of design and ease of construction, even with limited DIY tools and materials. The printer, specifically for printing in clay, was easily constructed, making it an attractive option for other artists, designers and potters to build themselves. The printer he launched and the desire for people to create their own clay 3d printers continues to be supported via a Google+ Community called  Make Your Own Ceramic 3D Printer.

The workshop...
What I'd like to convey here are some observations and explanations of the clay printing process, complemented with photos and videos from the two day workshop I attended. It was interesting from my perspective to be comparing the clay 3d printing process to that of printing in plastic, as I'm very familiar with plastics, but never before printed in clay. There were many parallels and some differences which I'll try capture. Also, this post is not meant as an instructional document, more a log of key processes followed and some notes along the way.

The Workshop took place at Fab Lab Limerick, which is equipped with a variety of 3d printers. One of these, the Wasp, has a 3d print-head and related air pressurised chamber for clay delivery. This is what was used for the workshop.
Jonathan setting a clay print on the WASP printer.

A simple hollow cylinder always forms a good test print for tuning in the printer.  Photo: Johanna Aaspollu.
Cylinder Diam 50mm approx.
It's all in the preparation...
What immediately stood out about printing in clay was the time given to preparation. In plastics the only setup time is in changing a roll of filament or waiting for the heated bed to come up to temperature. In clay, the preparation of the clay is everything. Softening the clay with the addition of water is a skilled process. The judgment of how soft to make it also requiring careful judgment and experience. Too hard and the the clay won't flow easily from the pressurised chamber. Too soft and the printed object won't support it's own weight and simply collapse. The best way I can convey the mixing process and final consistency of the clay is the share a video of the process in it's entirety.
Clay is cut in thin slices using wire, and dipped in water for an initial wetting. A fork is used to increase the water contact area with the clay. The complete softening process is illustrated in full in the video below (20min).
Video courtesy of Johanna Aaspollu, Fab Lab Limerick.

Note: Some clay preparation guides illustrate the use of  ethyl achohol (ethanol) as a softener, mostly in place of water. The ethanol will decrease the viscosity of the clay also. It will evaporate during the drying stage and may make softening the clay an easier process, but in discussion during the workshop it was collectively felt that for health and safety reasons we would stick with water. Good ventilation and masks would be required to work with ethanol.

Loading the clay...
My observation of clay printer designs is that there's a chamber of some sort to hold the softened clay. This cylinder typically has a piston type insert and is pressurised by air or perhaps mechanical means to force the clay out of the cylinder, through a pipe, to the print head. The clay may be directly fed to a nozzle, or delivered in a more controlled manner via an auger screw driven by a stepper motor. The WASP has a motor driven screw to move the clay through the nozzle. The movement of the print head in three dimensions on a clay printer is no different to equivalent style plastic printers.

In our workshop session Jonathan took the clay and carefully loaded it into an aluminium cylinder, adding large scoops and careful to avoid trapping any air while loading. The clean inside of the cylinder received a light coating of silicon spray lubricant before loading any clay.


There isn't a single "right way" to load clay. The important point is to avoid any method that might get air pockets trapped in the clay. The piston, in the WASP design, has two rubber "O" ring gaskets. It's important to ensure they are seated well and free of clay from any previous use.

Both end-caps of the cylinder were screwed back on, hand tight, making sure the threads were clean. The air valve was opened slowly until the pressure rose to about 4 bar, and clay began to flow through the 12mm teflon tubing, connected to the cylinder via a pneumatic style push-fitting.
Above shows the air pressure control valve which keeps the piston under force against the clay in the cylinder.
Above: Jonathan opens the air valve, increasing the air pressure to about 4 Bar. Clay begins to flow at a slow but steady pace from the connected pipe. This pipe then gets connected to the push-fitting in the extruder printhead assembly.

Slicing and tuning...
With a presumption that you are able to get a 3d model of your object to STL format, the next key step for 3d printing is to 'slice' the object. This generates a 'gcode' instruction file for the printer. There are many slicing packages to choose from, and everyone has their favorite. The fact that we were printing in clay was is some ways irrelevant to the slicing process.

If anything, configuring your slicing software for clay printing is a lot easier. You have no heated bed, nozzle temperature or cooling to consider or manage. Typically also your are printing a 'vase' or 'vessel' style single walled object, so infill percentage or pattern is not a factor. A 'spiral' or 'vase' setting is usually chosen, and that was the primary choice in our workshop also. With this setting it's usual not to have any top or even bottom on your object. If a base was desired on our objects then Jonathan quickly showed us how to press a solid disk in clay and print onto that. This over-sized base could be easily trimmed to shape later once the object was printed and allowed to dry for a while. This also saved on printing time and gave good solid bases to our prints.
Above: Jonathan shows a clay base placed on an MDF disc.

The WASP printer only came with a .5mm nozzle for the clay extruder. Jonathan's preference was for a 2mm or even 3mm nozzle for clay printing. A new nozzle was fashioned from some threaded rod and drilled out to 2mm by Michael in the Fab Lab, and it worked excellently, as visible in some of the photos below.

With experience and confidence showing, Jonathan soon has the printer working well with the new nozzle, choosing to just get it printing then play with the flow setting via the printer control panel.

An easy way to tune in the printer was to print a simple cylinder, with a .6mm layer height and ~ 1.5mm wall thickness set in Cura and see what happened. Jonathan adjusted the flow rate on the machine's control panel until a visually satisfactory result was obtained. Corrections could always be made back into Cura settings later to negate the need for any control panel changes when printing in future.

This approach taken by Jonathan may be in contrast to how you might carefully research and select settings for your particular machine when printing in plastic for the first time. But clay from a 2mm nozzle was far more forgiving of 'loose' settings. Once the Z height was reasonably dialled in the clay would take nicely to the base, and soon begin to grow the object as it spiraled around.
Above: Jonathan tuning the flow via the printer control panel.
Above: Test cylinder printing in 'spiral' mode, continuous rise in Z direction.
Video courtesy of Johanna Aaspollu, Fab Lab Limerick.
This cylinder was drawn in Blender and sliced in Cura,  Jonathan has shared  Cura settings on a Google+ ceramic printer group

Printer bed surfaces...
Jonathan recommended that an absorbent surface rather than a smooth surface was best for clay printing. An absorbent surface would absorb moisture, drying the base as the rest of the object also dried. A smooth surface under the base would prevent drying at the same rate as the rest of the object. Uniform drying of the clay is very important, I've learned. 

The Fab Lab laser cut some 200mm discs from MDF (9mm), and these proved ideal for printing on to. The printer was "zeroed" to the height of two discs, and as Jonathan explained in the following video, this meant we could choose to easily print our object with or without a base with no printer z-height adjustment needed. The discs were simply held in place with some 'blobs' of clay, and that gave a quick and efficient swap out of finished prints, welcome in our workshop scenario.

Above: Making a clay base for your print.
Video courtesy of Johanna Aaspollu, Fab Lab Limerick.

First prints...
The beauty of printing in clay, was that if your first layer wasn't good due to poor initial flow or even z-height setting, you could easily start over with a simple wipe-down and print again!
Above: Restarting a print job after poor initial clay flow.
Video courtesy of Johanna Aaspollu, Fab Lab Limerick.

Above: 5min in Blender, allowed Jonathan's experience to draw this object and move quickly to get something printing to demonstrate the process end-to-end early on in the workshop. Good strategy. Impressive result.
By the end of the two day workshop, everyone had produced some prints. Keeping in mind that many of the attendees had never 3d printed in any medium, the results were very impressive, and the workshop a great success. With the majority of the participants being from a ceramics background, students and professionals, this introduction to 3d printing in clay had everyone very excited about a new direction to explore with their clay medium. 
Above: A mix of objects printed during the workshop. The majority original creations, the lower two from Thingiverse thing:969262 and thing:1063915.
A big part of the 3d learning curve, whether you are printing in clay of any other material, is 3d modelling. Some of the workshop discussion was given to this topic, since many of the participants had no computer based 3d modelling skills. While the power and potential of Blender was demonstrated, we reverted to Autodesk Tinkercad, and in my case 123D Design to begin drawing some objects we could later print. (Sadly, both programs are now being retired by Autodesk.)  Identifying and learning a 3d modelling program that meets your needs is one of the biggest obstacles and challenges in exploring 3d printing in any material.


Above: Once fired the object is transformed in strength and appearance.

To conclude, a big thanks goes out to Jonathan Keep for giving the workshop, to the Future Artist-Maker Labs exhibition and events program for funding and organisation, to Fab Lab Limerick for hosting and providing the equipment and venue, and to the Ceramics dept. at Limerick School of Art and Design (LSAD) for firing the printed pieces. Should you care to view them, some more photos of the fired prints are posted to Ceramics at LSAD Facebook page.

Thanks for viewing.
Ivor